A flat tire doesn't always mean you need a new one. Knowing how to patch a tire correctly — and when a patch isn't safe — can save hundreds of dollars and keep you driving on a tire you trust. This patch tire guide walks through the full process, the differences between a plug, a patch, and a combination plug-patch, plus when to skip the repair entirely.
Tire Plug vs Patch: What's the Difference?
The tire plug vs patch debate trips up most DIYers. They aren't the same repair, and they don't offer the same level of safety. According to the U.S. Tire Manufacturers Association (USTMA), the only industry-approved tire repair is a combination plug-patch installed from the inside of a fully dismounted tire.
| Repair Type | How It's Installed | Safety Rating |
|---|---|---|
| Plug Only (DIY) | Inserted from outside without removing the tire | Temporary only — not industry approved |
| Patch Only | Glued to the inner liner from inside the tire | Seals leak but doesn't fill the puncture channel |
| Combination Plug-Patch | One-piece unit fills the hole and seals the liner | Industry-approved permanent repair |
Bridgestone's official guidance matches USTMA: a plug-only repair from the outside should be treated as an emergency get-home fix, not a permanent solution.
When a Tire Can (and Cannot) Be Patched
Not every flat is repairable. Following the wrong call here is genuinely dangerous — a failed sidewall patch can cause a high-speed blowout. The NHTSA and every major tire manufacturer agree on these limits:
Repairable: Punctures in the central tread area (the crown), 1/4 inch (6mm) or smaller in diameter, with no other damage to the tire structure.
Not repairable: Any puncture in the sidewall or shoulder, holes larger than 1/4 inch, multiple punctures less than 16 inches apart, tires run flat or under-inflated, tires older than 6 years, or tires with less than 2/32″ of remaining tread depth.
If your tire fails any of those checks, replace it. A patch in the wrong location is not a money-saver — it's a liability.
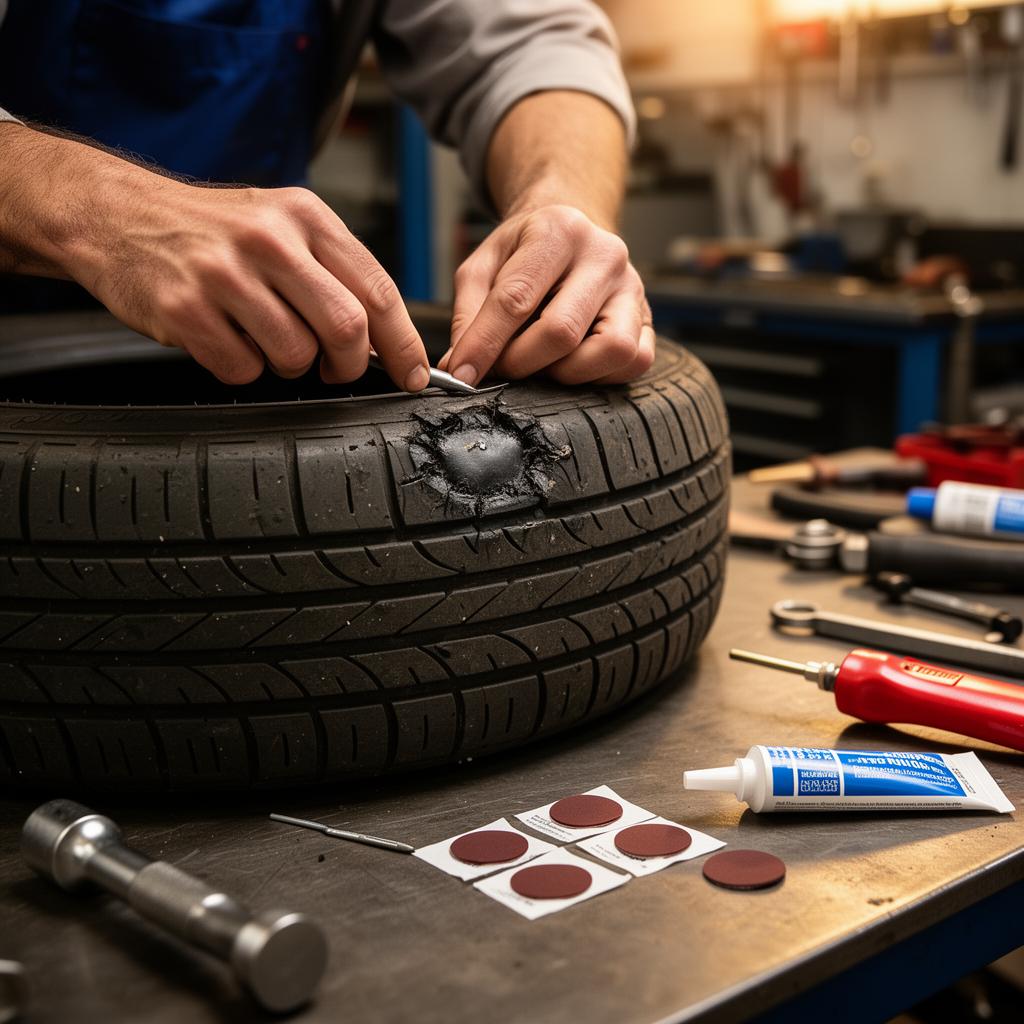
How to Patch a Tire: Step-by-Step Professional Method
This is the same process performed at reputable tire shops. If you don't have access to a tire machine, take the wheel to a shop — improperly demounting a tire can damage the bead and cause leaks worse than the original puncture.
1. Locate the puncture. Inflate the tire and spray with soapy water; bubbles will reveal the leak. Mark it with chalk on the outside.
2. Remove the tire from the wheel. Use a tire-changing machine to break the bead and dismount the tire. Inspect the inner liner for hidden damage from the object or from being driven flat.
3. Remove the puncturing object. Pull the nail or screw straight out using pliers. Note the angle — you'll drill the prep tool through at the same angle.
4. Ream the puncture channel. Use a carbide cutter (typically 1/4″) on a low-speed drill to clean and size the hole from the inside out.
5. Buff the inner liner. Scuff a 2-inch area around the puncture on the inside of the tire with a low-RPM buffing wheel. The surface should be dull, not shiny — this lets the patch chemically bond.
6. Apply vulcanizing cement. Brush a thin, even coat over the buffed area and let it flash off until tacky (about 5 minutes). Per Tire Rack's repair tech guide, skipping the cure time is the #1 cause of patch failure.
7. Install the combination plug-patch. Pull the plug stem through the puncture channel from the inside out, then press the patch flat against the inner liner. Use a stitching tool to roll out air bubbles, working from the center outward.
8. Trim the plug stem. Cut the excess plug rubber on the tread surface flush with the tread.
9. Remount, balance, and re-inflate. Always rebalance a repaired tire — the patch adds weight on one side. Inflate to the pressure on the door placard and check for leaks one more time with soapy water.
DIY Plug Kits: When They're Acceptable
A roadside plug kit (the kind sold at every auto parts store for $10–$20) is reasonable as an emergency repair to get you home or to a shop. According to Consumer Reports, a string-style plug installed from the outside should be replaced with a proper inside patch within a few hundred miles. Treat it like a donut spare — limited speed, limited distance.
If you do plug a tire on the side of the road, drive under 50 mph to the nearest tire shop and have it inspected. The technician needs to verify the puncture location is actually repairable before converting it to a permanent patch.
Cost: DIY Patch vs Shop Patch
A professional combination plug-patch repair typically costs $20–$45 at most tire shops, and many retailers (Discount Tire, Costco, Les Schwab) include free flat repair on tires they sold you. A DIY plug kit costs $10–$20 but doesn't include the equipment to dismount the tire for a true inside patch. For most drivers, paying a shop is faster, safer, and barely more expensive than buying the tools.
Frequently Asked Questions
How long does a tire patch last? A properly installed combination plug-patch is considered a permanent repair and should last the remaining life of the tire's tread.
Can you patch a run-flat tire? Most run-flat manufacturers (BMW, Bridgestone, Pirelli) do not recommend repairing run-flats once they've been driven on while flat. Internal damage from the reinforced sidewall flexing is often invisible. Replacement is the safer call.
Can a tire be patched twice? Yes, as long as the two repairs are at least 16 inches apart and both are within the repairable tread area. Three or more punctures usually means it's time for a new tire.
Will a patched tire need to be rebalanced? Yes. The patch adds a small amount of weight to one side of the tire, and any reputable shop will rebalance the wheel after a repair.
Is fix-a-flat sealant a real repair? No. Aerosol sealants are a roadside emergency only. Most tire shops will refuse to repair a tire that's been treated with sealant because it contaminates the inner liner and the tire-mounting equipment.